
Here We Draw everyday

Thursday, December 26, 2013
Study 01: 100 Air Gestures
A wonderful art friend, Brit and I wanted to learn how to draw acrobatic poses in the air. We decided on doing 100 of them. The idea was that it takes internalized principles to draw these kinds of poses with great energy and force. I reached the half way point today!

Tuesday, December 24, 2013
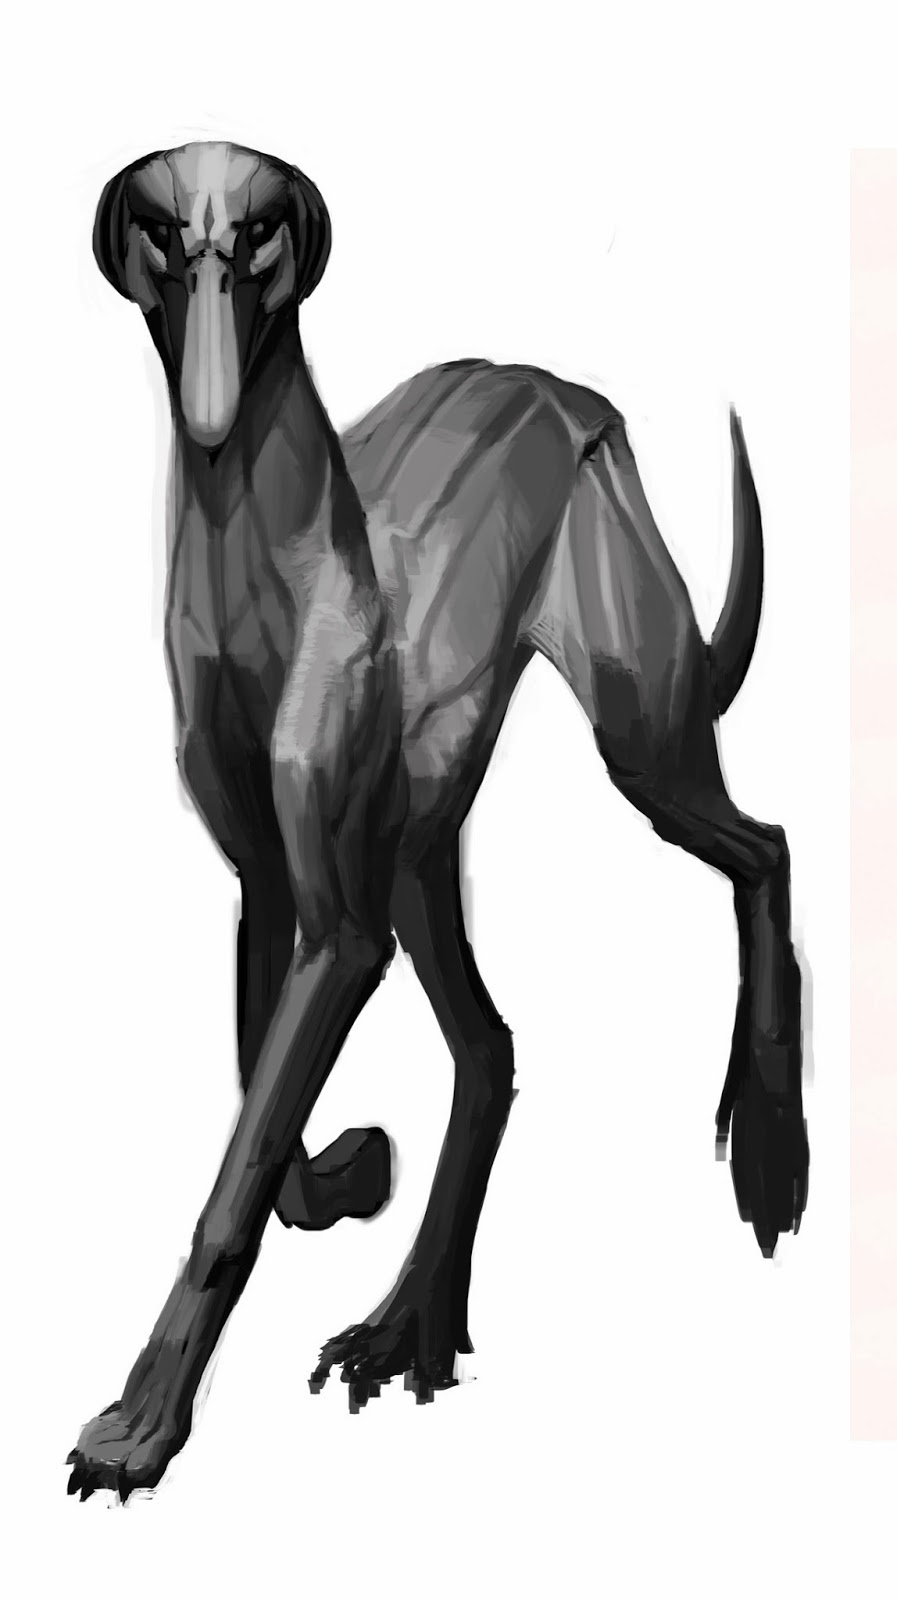
My Process 03: Concept to Finish; Female Neuroprancer
Here is the female Version I did of the Neuroprancer creature design!
 |
| Napkin sketch. |
 |
| Planar study for perspective and lighting. |
 |
| Basic lighting pass. |
 |
| Refined basic lighting pass. |
 |
| Added secondary forms pass. |
 |
| Refining the form pass |
 |
| Add textures and more refining |
 |
| Colorized with a new layer |
 |
| Basic color pass. |
 |
| Added chroma and harmonized colors. |
 |
| Post production on lighting. |
 |
| Close up of the head. |
Thursday, December 19, 2013
Eduaction Cast 01: Why Should An Artist learn anatomy?
Wednesday, December 18, 2013
My Process 02: Concept to Finish

Here is how I go from napkin sketches to a completed render!
 |
| The Napkin Sketch: I Started with a hand full of napkin sketches in order Familiarize myself with the design. Originally, I wanted to combine the flexible gesture of a feline with the head of a bird. I was not satisfied with the design for some time and needed to do further exploration. |
 |
| The Three P's: After several rounds of sketches, this is what I finally came up with . For novel designs, it can take a while before I am familiar enough to capture it with a simple line drawing. at this stage i have solved the three P's , the body's Plan, Posture, and Proportion. |
 | ||
| The Fourth P, Perspective: Since this design will be interacting with 3d space i need to solve the perspective problem. I create simple volumes by making a planar analysis. |
 |
| Rendering Greyscale Pass: After several passes at form correction, I am familiar enough with the design to begin rendering it. as you can see I start my render in greyscale. |
 |
| Rendering Color Pass: Once I am happy with the greyscale rendering I add color. |
 |
| Rendering Texture and special Effects Pass: I am now ready to add the final touches to the design. This stage helps really make it come alive. |
.jpg) | |
| Close up! |
Sunday, December 15, 2013
My Process 01: Painting a Creature Design From Start to Finish
Here Is a Demo of a creature design I am currently Working on for a FB contest.
 |
| 1. Getting Big Ideas Out: Napkin sketch: I call my first attempts at creating a design the napkin sketch. It implies rapid drawing where the big ideas are of concern and details are ignored. It isn't something you show to people but is a personal way to get ideas out to see if they work in a general way. |
 |
| Version two of a napkin sketch but massing in big shapes instead of just line. This one is slightly more developed. I do napkin sketches until I am satisfied with the general idea. |
 |
| This is the final iteration of the napkin sketch. I am satisfied with the overall idea and can move ahead. Note: After several iterations of sketching the design, I have become very familiar with it. This familiarity is paramount if I want to have a smooth process from beginning to end. |
 |
| 02. Form Exploration , Correction , Familiarity and the Three P's : After I finish the napkin sketch stage, I need to explore and correct the forms so that the details I add later will work. The degree in which I am familiar with my idea determines how much effort I put into this stage. On a rating scale of familiarity I would say I was about a 3 out of 5. I still needed some exporting to do. Here, I started with putting in the skeleton at the core of the design. This helps to better understand the 3 P's: The body's Plan, Posture, and Proportion. |
 |
| I continue the form exploration to the surface with the muscles. Please keep in mind I am already familiar with anatomy. I need to get the big idea out. This means I don't need much detail to work with . There is a lot going on and being brief and simple is important. I recommend getting very familiar with anatomy before trying to be brief. Know all the details first then simplify later. |
 |
| 03. Rendering: Once I have made corrections and familiarized myself even further with the design, I am ready to render. I start rendering basic forms first and with multiple passes, I further refine them. The front half is my first pass while the back half is the second pass. Note: there is a big just in the beginning passes but as you see not so much in the later ones. |
 |
| The second pass is completed for the back half. |
 |
| I begin to render the second pass for the front side. The black dot in the center indicates where I am going to work next after I complete this pass. |
 |
| Second pass is completed for the front side. |
 |
| Started the Third pass. please toggle back and forth between the images to see the difference. |
 |
| Third Pass Complete. |
 |
| Post Processing with Instagram Rise Filter. |
Subscribe to:
Comments (Atom)